

Water management is an important aspect of designing a sustainable garden. Without water, nothing grows. As I’ve said before, it’s virtually the very essence of life itself!
In Permaculture, designing a garden to make optimum use of water is critical, especially in a country like Australia, the driest continent in the world, where water shortages are common.
French drains are one of the many tools used in Permaculture to best manage water.
Before delving into the details of French drain construction, it’s best to understand the very element we’re dealing with – water!
The Permaculture Perspective on Water
Water is one of the critical design elements in Permaculture. We work on capturing it, using it as efficiently as possible, reusing it where possible, and dealing with wastewater in a sustainable way.
Without understanding the nature of water and how it behaves, you cannot create an efficient Permaculture garden design. To understand how to use French drains in gardens, we’ll cover some water basics:
- Water always seeks the lowest level – it naturally flows downwards due to gravity and runs from higher to lower levels until it settles at the lowest point. This may seem obvious, but we need to consider what it means in the context of nature, soil and plants. Consider rainwater falling on a mountainside. It will trickle down the slope quite quickly, picking up loose soil, debris, leaves and other organic matter, and carry them with it down the side of the mountain. The land eventually levels out into a valley, where all the nutrient-carrying rain ends up, resulting in a moist, fertile valley, which also probably has a lake at the bottom. The plants in the valley have all the water they can use, as it seeps deep into the soil, where it can be accessed by the roots of plants and trees. Conversely, very little water has soaked into the mountainside, as it runs along its surface, with very little soaking into the soil. Furthermore, soil and nutrient-rich material is potentially stripped away. If the water doesn’t flow into a valley, it forms a stream, which flows into a creek, which flows into a river, which finally flows into the sea – and with sea level being the lowest level, the water finds its way there, as it naturally does.
- Water takes the shortest path to the lowest level – water flowing down the side of a hill or mountain will take the most direct route to the bottom, as will any running water, such as a stream or river. By taking the shortest route, it makes the minimum contact with the soil, and therefore soaks as little as possible into the soil on its downward journey to the lowest point.
- Water is strongly absorbed by composted organic matter – humus, which is the result of the breakdown of plant matter, makes for a rich, dark soil with good water-holding properties. It is hydrophilic, that is, it draws and holds water. Soils that are dried out, leached, with little organic matter left in them don’t hold water; it runs off the surface. These are termed hydrophobic, that is, they repel water. If you’ve watered an area of depleted soil, only to dig into it afterwards to find it is bone dry underneath, then you’ve seen hydrophobic soil in action. If you want your soil to make the most of available water, then add lots of organic material to your soil; it’s that simple.
- Water can be slowed and retained in the landscape – by utilising swales (contour trenches that run along the slope of the land at a constant elevation), we can slow the flow of water across the land and encourage it to soak into the soil. Swales work by diverting the flow of water from vertical (straight down the slope) to horizontal (along the slope) and by catching and pooling the water, allowing it to slowly seep into the ground rather than rushing downhill.
- Water responds to design – by understanding water’s nature and applying design principles, we can manage how water flows, is retained, and is distributed across a landscape to meet our needs and those of the plants and animals living there.
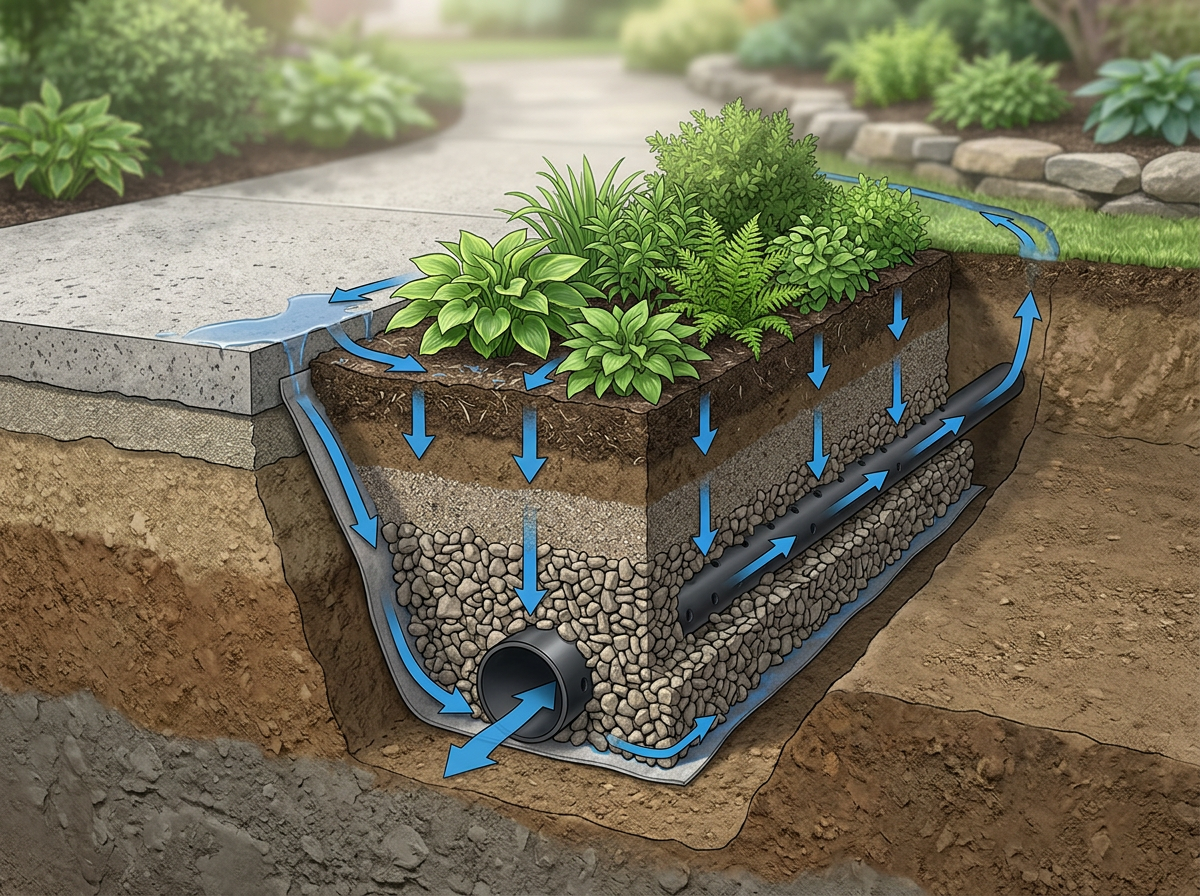
Naturally, swales are more at home on rural hillsides than in urban backyards, though you can utilise the same concept on a smaller scale by creating a small trench on a slope to prevent run-off. For those of us with concrete in our backyards, which has 100% runoff and doesn’t retain any water, there is still hope! The next best thing to a swale is a French drain for capturing runoff and redirecting it back into the soil.
In the instructions below, we’ll go through a real-life example from my backyard. So, let’s have a look at French drains!
What is a French Drain?
A French drain is a long trench dug into the ground in the soil and filled with gravel to redirect water away from an area and carry it elsewhere. A French drain can have one or more perforated pipes (slotted Ag agricultural drainage pipes or “slotted Ag Pipes”) running along the bottom to improve drainage and carry away water more quickly.
Traditionally, French drains are used to carry water away from building foundations or to serve as outlets for septic tank sewage treatment systems, distributing the water over a large area so it can seep into the ground.

As you can see, it’s a fairly simple concept. Now, let’s have a look at a real-life example in design and construction.
How a French Drain Works and How to Build One
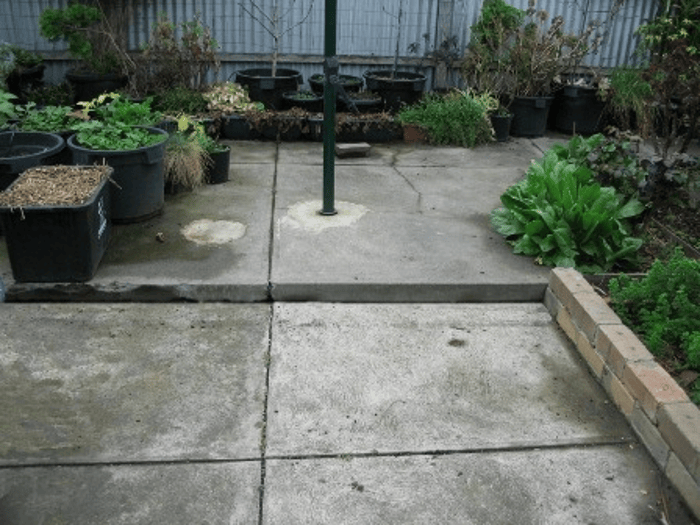
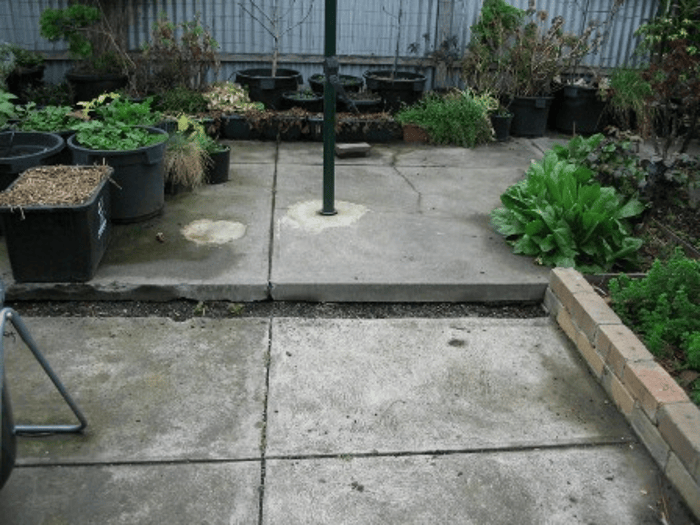
Pictured below is the rearmost part of my backyard, with the back fence in the background. The block of land is sloped, highest point of elevation at the back, the front of the house is the lowest point.
Now, to explain the problem…
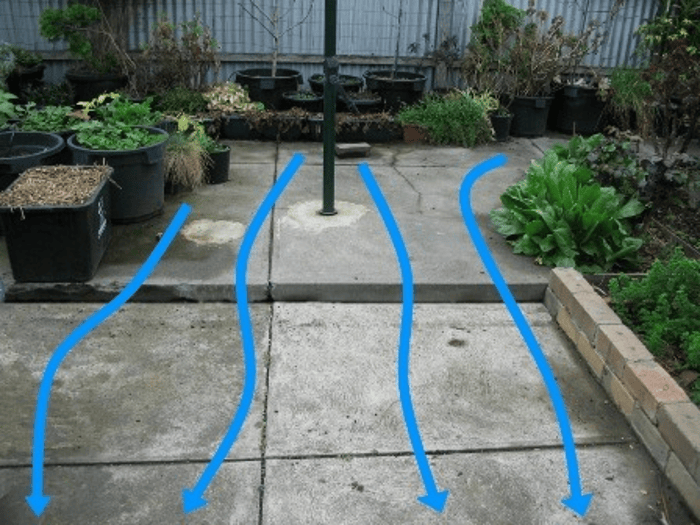
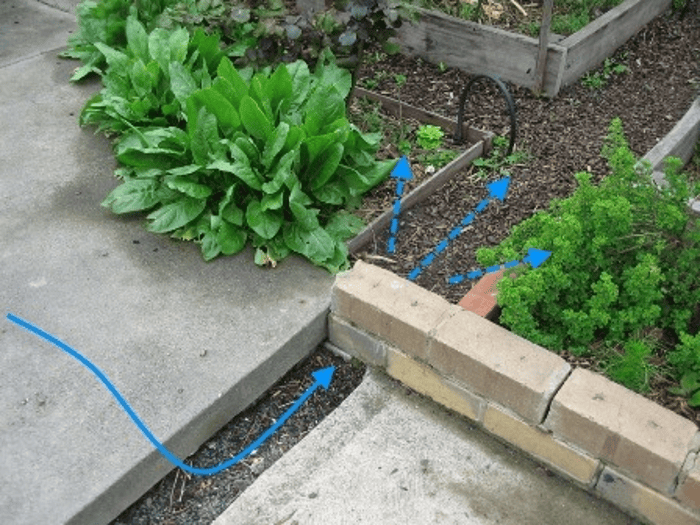
The blue arrows show how the water flows when it rains. It flows over the concrete area pictured, down the concrete steps, along the walkway at the side of the house, then down the driveway, by which time it has travelled over thirty metres to the footpath, where it runs into the stormwater drain.
This small space above the step where the clothesline (the green post in the middle of the picture) is might seem trivial. However, there’s an additional point to consider. You can probably spot a line of pots along the back fence, all equipped with trickle irrigation. After watering, the runoff water, enriched with nutrients from the soil in the pots, flows down the slope to the stormwater system. Redirecting this water back into the garden would be more efficient, conserving water and recycling nutrients.
Considering the question of rainwater, the area in question is roughly 3.5m by 2.5m, totaling about 8.75 square meters.
If we remember our rainfall formula, 1 mm of water over one square metre of roof (or surface) yields one litre of water.
In Melbourne, our dry climate averages about 700mm of rainfall annually, meaning each square metre of surface can collect 700 litres of water. When considering our small concrete patch, the calculation shows it captures 700mm multiplied by 8.75 square meters, totaling 6125 litres of rainwater, excluding runoff from irrigation and pots.
Now, the question is whether the 6000 litres of rainwater should be redirected to my garden or washed down the gutter into the stormwater drain. Unless you live in a swamp, the answer is clear! So, let’s start building!
Step 1. Mark the concrete for the cut
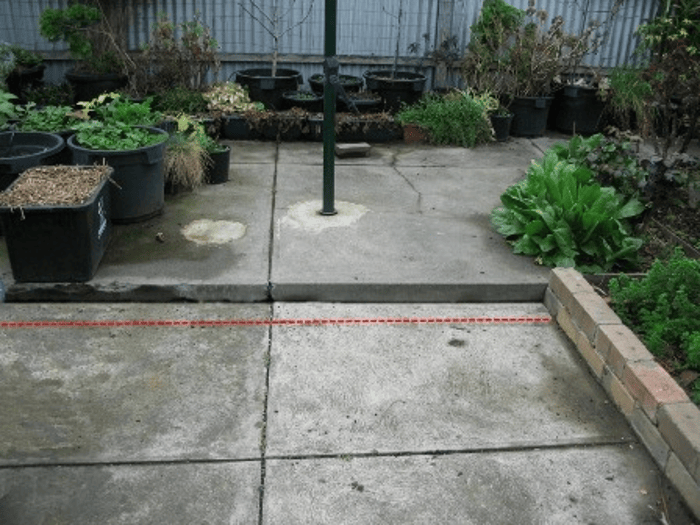
Cutting concrete can be dusty and messy, so it’s helpful to mark the cut line beforehand. In the picture below, I marked the cut with a dashed red line. In this example, the trench width is 15cm (6″).
To mark the cut, the traditional method involves using a builder’s chalk line tool. The image below shows a chalk line and a bottle of what’s called “chalk.” Although it’s called chalk, it’s actually a special marking material that is available in two types: temporary, which washes off with water, and permanent, which never comes off! It’s advisable to use the temporary type in case of mistakes. Chalk also offers various colors, so choose one that provides good visibility.

A chalk line is a string stored on a winder inside a container of powdered chalk. To use it, secure one end at your starting point—either by pegging it down or having someone hold it—then unwind the string to your desired ending point and pull it tight. To mark the concrete, lift the taut string like a bowstring and release, causing it to strike the ground with a sharp “snap” that leaves a chalk line. Repeat a few times if necessary for a clear mark. I own a chalk line and used it to make the mark—it only takes a few seconds.
If you don’t have a chalk line, you can use a straightedge—such as a long, straight object—and blackboard chalk instead.
Step 2. Cut the concrete
This is the tough and messy part. The professional way to cut concrete involves using a demolition saw. It resembles a large chainsaw motor with a sizable cutting disc, designed to create openings for doors and windows in concrete walls. These saws can perform wet cuts by directing water into the blade to minimize dust. Usually, these powerful machines are rented, which can be costly, so they’re not practical for small jobs. It’s advisable to check the daily rental rates. By the way, this is what a demolition saw looks like.

Since hiring a professional tool for a single 2.4m (8-foot) cut wasn’t cost-effective, I chose a cheaper but more challenging method: borrowing a friend’s 230mm (9”) angle grinder fitted with a masonry cutting disc designed for concrete. An image of this tool is shown below.

Here’s how the finished French drain looks and how the water now flows into the garden beds rather than the stormwater drain.
Since it’s an electrical cut, water cannot be used, which results in a huge amount of concrete dust. Believe me, you’ve never seen this much grit in one place! It will spread everywhere, so if you’re not fully covered in protective clothing, you’ll look like a statue covered in dust. Wearing protective eyewear, hearing protection, and a respirator is essential because the concrete dust is hazardous to your eyes and lungs. The noise is deafening, and cutting through thick concrete while keeping the saw steady and heavy is a slow, exhausting process.
Use these two monster tools for a clean, straight cut. If you prefer a less precise approach, you can cut the concrete in any way you like. Methods such as using a club hammer and cold chisel, then prying out the pieces with a wrecking bar, are also effective but require more effort and tend to be less messy.
I guarantee that after finishing the concrete cutting, you’ll question why we ever chose to cover all our spaces with this god-forsaken substance!!!
Step 3. Fill the Trench with Gravel (and Optional Drainage Pipe)
After all the drama and commotion, hopefully, you’ll have a neat, straight trench. Remove any broken concrete pieces and dig the soil to the necessary depth. For mine, I made it 15cm (6”) deep. Next, lay the slotted Ag pipe (agricultural drainage pipe) and fill the trench with gravel, or omit the pipe and simply fill with gravel.
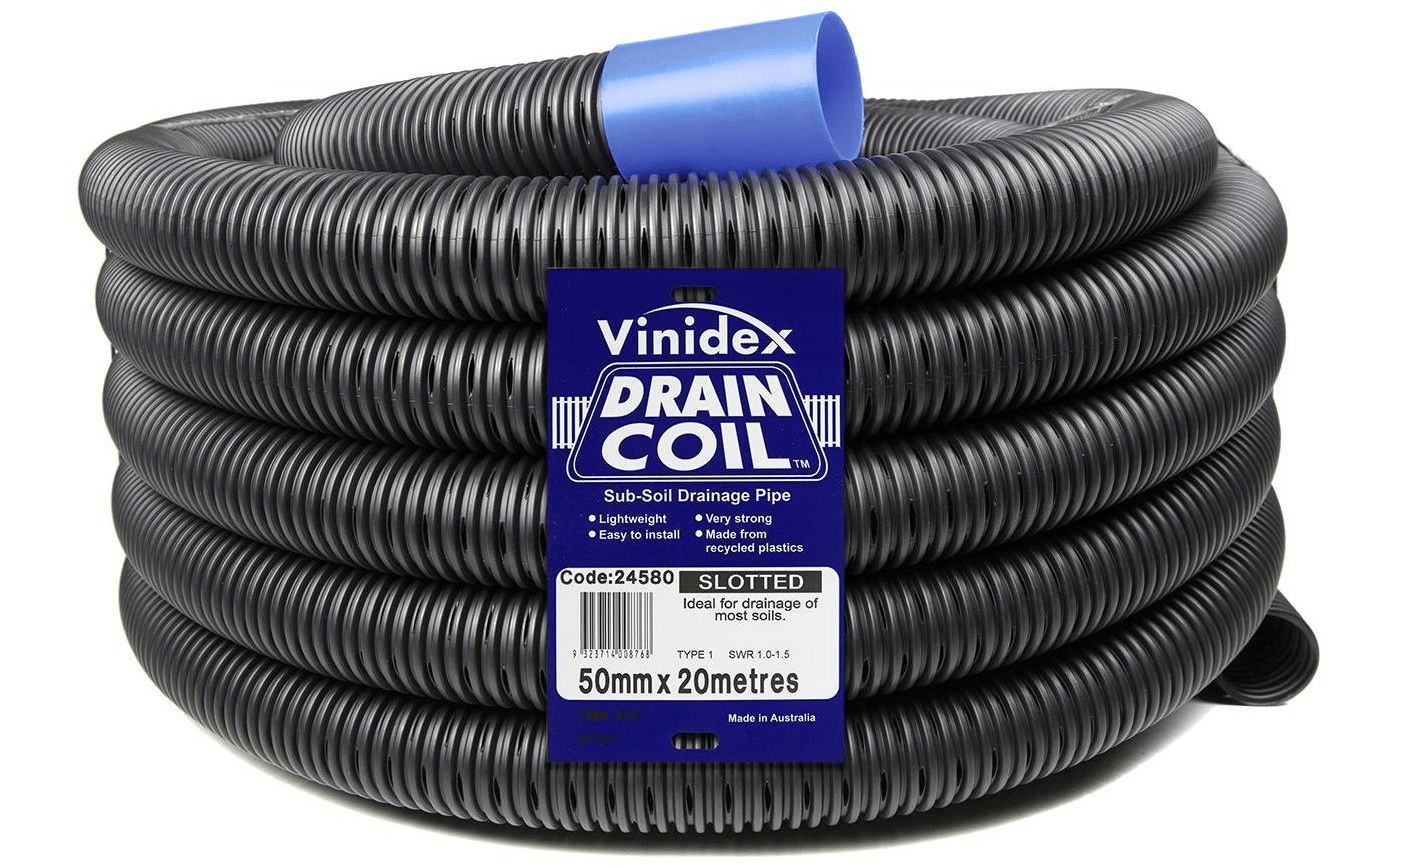
The slotted Ag pipe (shown below) significantly improves drainage. Use it if needed, as it is inexpensive and helps reduce the amount of gravel required to fill the trench. Ensure you choose the slotted type, which features holes or perforations along its ribs, allowing water to enter and flow through easily.
After adding the gravel, level it using a flat board, spade, or the back of a rake. Your French drain is now finished.
Results and Takeaways
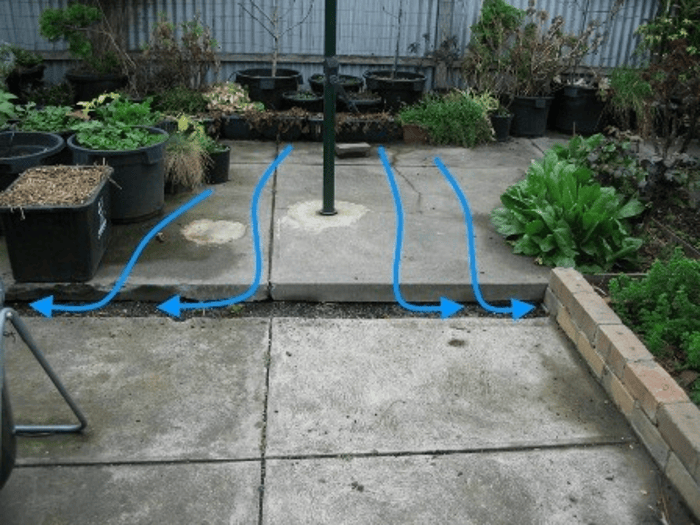
This completed French drain is modest in appearance but highly effective.
If we retrace the water flow, as we did before, using the blue arrows, we see that the water is redirected sideways along the trench.
Let’s take a closer look at the French drain.
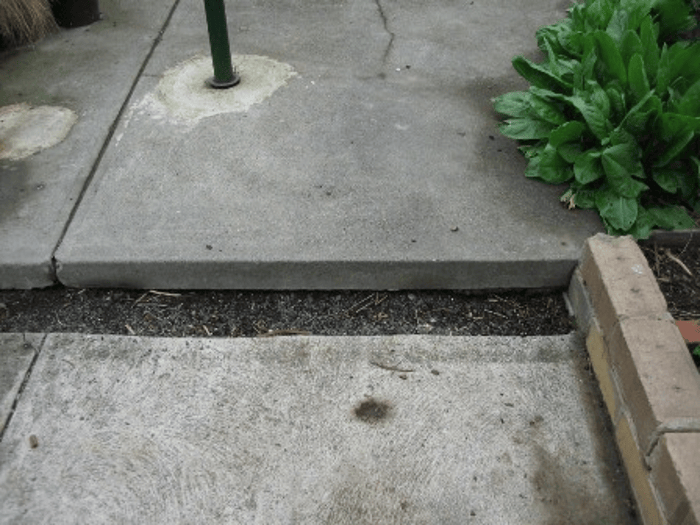
Clearly, the drain ends must lead somewhere! In this case, the right side flows beneath a mulched path into the garden beds.
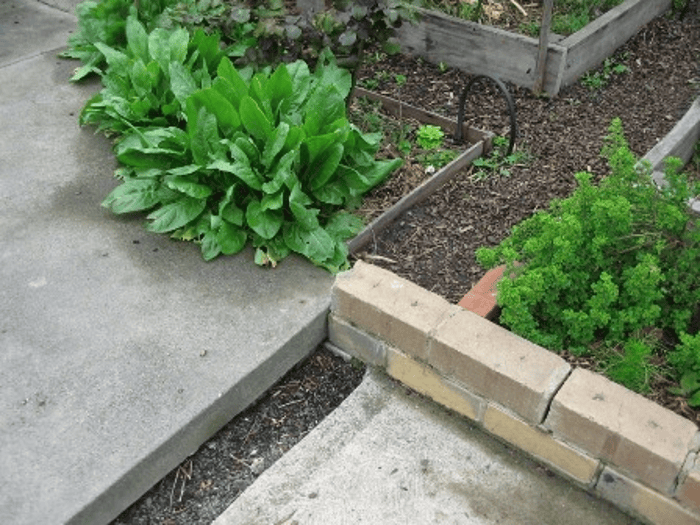
Water flow into the garden beds is indicated by the blue arrows.
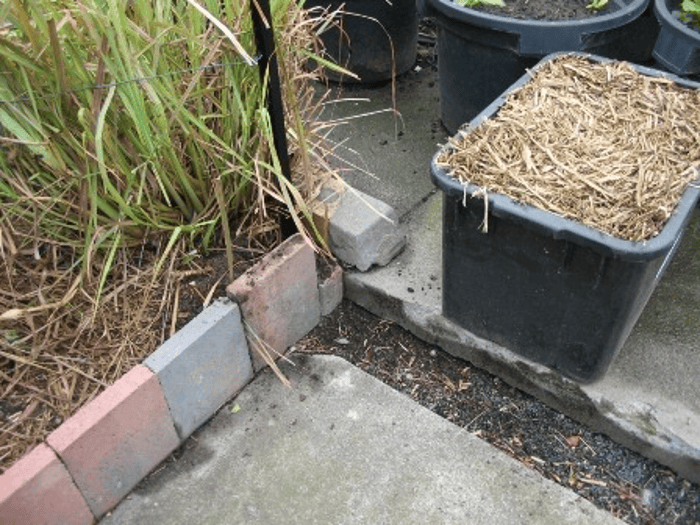
The other side of the French drain also directs water into a garden bed, near the lemongrass, which benefits from the additional moisture.
Overall, cutting the concrete with an angle grinder was extremely difficult, but it’s worthwhile considering the garden receives an additional 6000 liters of water annually from this small effort. This significantly improves the garden’s resilience and drought resistance, while also conserving water over time. Additionally, although traditional swales may not be feasible in urban permaculture, we can adapt similar principles through creative approaches.
Permaculture is centered on creative solutions, so embrace your creativity and don’t hesitate to get your hands dirty. Your efforts can make the world a better place!
Want a more decorative French drain? You can plant it with the right type of plants to maintain water drainage and prevent weeds from growing.

This is what the French drain looks like with Creeping Thyme planted on it.

you are a great teacher, angelo. one who teaches what he practices!
Thanks DV! I must say, your work with swales at pointReturn is truly inspiring, so I’ll let people know of your amazing work!.
For anyone who’se interested, DV has done some amazing work with swales in India, here is a link to his thorough 8 page article “Falling in love with swales”: http://goodnewsindia.com/pointreturn/online/swales/
Here’s the link to a slideshow on the swales at pointReturn: http://www.youtube.com/watch?v=NfFQ67XEZp0
It’s quite impressive what a transformation the swales make to the landscape!
Wow. Thank you for mentioning this superb resource. What an inspiration, dv!
Nice work Angelo! I’ll forward this to the permablitz designers guild.
Thanks Adam, that will be great, should prove to be a useful technique for urban permablitz projects!
Regards
Good work on this. Harvesting run-off from urban area is key to reducing heat island effect, reducing stormwater flows and improving stream quality.
I have a slight concern with your design in that a impervious barrier on the downward slope would further reduce moisture build-up underneath the concrete. Excess moisture as you know can lead to cracking etc. My experience in Melbourne was in fact the opposite with dry soils literally falling away when denied moisture content 😉
Thanks! Excellent points for the benefits of harvesting run-off!
In this example, I haven’t employed an impermeable barrier because the concrete area is not sealed off from the garden beds to either side, so water was free to seep from the garden beds under the concrete, even before the french drain was cut. Water doesn’t really settle because the block of land is sloped, and the garden beds are terraced. The soil at the bottom of the french drain is compacted clay soil, that’s what they used to lay the concrete over, so it forms a kind of water conduit that doesn’t absorb much, the water takes the path of least resistance into the better aerated humus on either side. I tested it out by seeing what the rain does before I filled it it, it works pretty well. Also with the heavy plantings, many plant roots extend under the concrete, I know for sure my licorice plant has crossed under a metre wide concrete path and come out the other side, and I suspect the fruit tree roots tap into the moisture in summer.
I find that for the structural integrity of buildings and other man-made structures, a certain level of moisture needs to be present. Unfortunately, the clay soils in Melbourne shrink a lot when they dry out, as in our previous drought period, and house foundations sink!
You raise a good point though, in a situation where a french drain is cut into a level block with permeable soil underneath, an impermeable barrier of some sort can be used to direct more of the water where you want it to go. The ultimate extension of this principle would be to form a shallow gutter in the wet concrete when it’s first poured, that would basically be a water channel, and would work splendidly in the right circumstances.
Regards
Love the idea of redirecting the water to encourage it to sip back into the soil but, our community gardens seat on very compacted clay soil. Would the French drain work as well?… Any thoughts.
We do have a considerable area that gets really boggy, and we are trying to avoid draining the run off to the storm water system.
Thanking you for the advice
This is a really great idea! It’s got me thinking. I have a small urban garden, and my veggie patch is on the North side of the garden, a few metres from my neighbour’s fence. (Along which I am planning to put in a chook run as well) They recently pulled down a shed on the fence line, and have put down gravel (about 8m x 4m), which usually means poison at some time to kill the weeds. They are slightly up-slope from us and I was thinking of digging in galvanised iron or something in along the fence line to stop run off (I have some old roofing iron). A drain like this could be more effective though. Do you think this is an issue? Maybe I’ll have to build raised beds for the veggies, and put the chook run elsewhere.
Hi Melissa,
I’m not quite sure how much run-off you’ll get from your neighbours, and how much weed killer will potentially travel with the water, but you could use a french drain to catch the water and carry it away. The only issue is that french drains permit water to seep into the soil beneath them, so you’ll get some absorbtion into the soil. The only way to stop 100% of any runoff from your neighbours would be a traditional concrete drain/gutter to catch any water runoff as route it away from you garden. The roofing oron will stop it running across but wont stop it seeping down, unless there’s a good slope to giuide the runoff away. Bit tricky, wish people wouldn’t poison the soil with weedkiller!
Thanks. I really appreciated this. I have recently moved from concreted inner Melbourne (Prahran) so know exactly what you are taking about! I now have 24 acres on the mid north coast of NSW. The whole block is a slope. French drains will help retain soils and water; not just divert it as I’d first thought. just wanted to say that I learned the perforations in the ag pipe need to face down as water pressure pushes up. Thanks again.
Can I plant plants on the top of the French drain or will that ruin the flow of water away from the basement? I just finished filling in the drain along the whole side of the house- to keep water out of the basement, but. Ow I’m not sure what to do with the top layer? Put grass seed, plant my garden along the sidewalk, or just the low point across the length of the sidewalk, or dig the old garden up and make the whole thing lower than the sidewalk which is the length of the house to ensure no overflow ever happens again.
You can definitely plant up a French drain to stop it filling with weeds, using a shallow rooted groundcover plant that loves good drainage, you can see what I’ve done here with mine – https://deepgreenpermaculture.com/2016/01/21/lawn-alternatives-creeping-thyme/
swales have obvious benefits. I wonder though how to apply them in very steep slopes with only a thin layer of fertile soil (4-5 inches) over a sandy base … firstly one would loose the fertile earth that you dig out because the rain will take it away. Second the sandy ground will let the water drain down quickly – at least in the beginning.
In sandy ground on a steep slope you need to stabilize the soil, and you can do this by planting a row of vetiver grass. It will root very deeply and as organic matter gathers behind it, it will elevate itself and begin to form a natural terrace which will act exactly like a swale.
This is some really good information about water drainage. It is good to know that it would be smart to now that some soil will absorb water better than other types of soil. That is a good thing for me to know as a new homeowner in an area that gets a lot of rain.
Great resource as usual. Thank you Angelo!
Just shared this post regarding how to build a French Drain. I’m sure that many property owners will be researching how to keep water at bay from their homes after the massive flooding and rain that we have been experiencing , Thanks
Thanks, hope they find it helpful!
Building a French drain is not easy, so I am thankful to the writer who has published this guide here. For my next project, I will follow this guide and create an excellent French drain.