Composting lets us recycle plant materials so we can reuse them in the garden, but the materials need to be broken into small pieces for the process to work efficiently. Traditional composting works well for soft green plant matter, twigs and small branches, but what do we do with thick branches or even huge, heavy tree trunks?
Long before the invention of chainsaws, chippers, and mulchers, farmers found a way to recycle fallen trees, returning the nutrients in huge logs to the soil. They have been doing this for hundreds of years. Of course, to keep things in perspective, Nature has been doing this for hundreds of millions of years – old trees fall to the ground, where they are covered in organic matter and slowly rot back into the soil. Nature has evolved systems for recycling EVERYTHING!
In Permaculture, we look to Nature for solutions and use existing natural processes to make our work easier, more energy efficient, and sustainable. We also aim to recycle materials and energy by capturing, storing and using them on site. These ideas are outlined in the Permaculture Design Principle – 5. Using Biological Resources and 6. Energy Cycling, respectively.
What is Hügelkultur ?
Hügelkultur, meaning “hill culture” or “mound culture” in German, is an old European system for composting logs, branches and other woody material by covering them with compostable plant materials and then covering the whole lot with a thin layer of soil to create a mound that can be planted up as a form of mounded raised garden bed.
The way this system works is quite simple. It’s essentially a slow composting of woody material. As the buried wood breaks down, it slowly releases the nutrients it contains to the plants growing on or near the hügelkultur bed. In addition, the warmth generated by the composting process assists plant growth.
The Hügelkultur technique can be used to create a fertile garden bed in compacted or very poor soil, and it can also be used to improve soil quality and water retention in reasonably good soils.
How does it do this? All composting processes improve the soil by creating humus. Humus is decomposed organic matter, and its presence in the soil increases fertility and water retention. When woody material breaks down in the soil, it creates a very stable humus because carbon compounds called lignins in the wood resist breakdown, providing benefits to the soil for a long time.
This hundreds-of-years-old technique, hügelkultur, was popularised and further developed by Austrian permaculturist Sepp Holzer, sparking renewed interest among permaculture practitioners.
How to Construct a Hügelkultur Garden Bed
A hügelkultur bed is really just a compost pile with lots of wood in it, capped with soil and planted with plants.
You can build hügelkultur beds in many ways, eitheron flat ground or in a trench dug into the ground.
Hügelkultur beds vary in size; typically, beds are about 2m long x 1m wide (6’ x 3’) and 1m (3’) high. This size makes for a fairly easily manageable garden bed. Some prefer to construct Hügelkultur beds that are shorter (1.2m or 4’), longer (2.4m or 8’) or even continuous!
Here is a basic hügelkultur bed construction technique sourced from Toby Hemenway’s excellent book “Gaia’s Garden: A Guide to Home-Scale Permaculture”:
“To create a hugelkultur, pile up branches or brush a foot or two deep in a mound 4 to 8 feet long. Stomp on the pile to compact it a bit. Then toss compostable materials—grass clippings, sod, straw into the pile. Sprinkle some compost on the mound, and top with an inch or so of soil. Then plant the hugelkultur with seeds or starts.”
In the same book, he states that potatoes grow very well in hügelkultur beds, and “Squashes, melons, and other vines do well here too”.
The hügelkultur bed construction technique is shown in the diagram below.
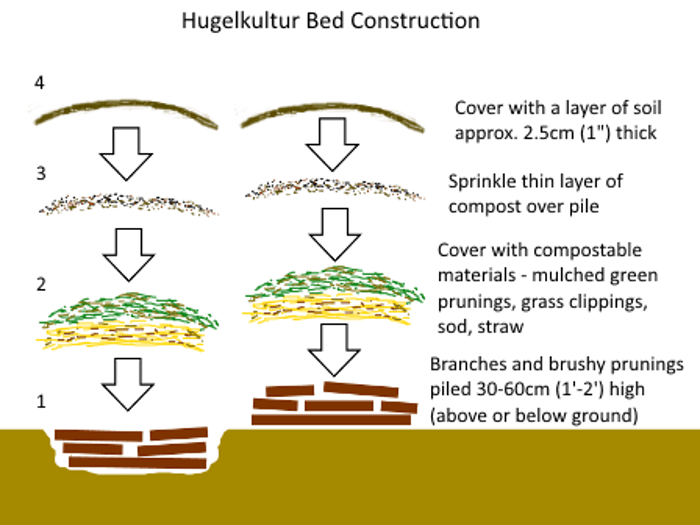
The basic steps to construct a hügelkultur bed are as follows:
- Lay a pile of branches, twigs, brushy prunings and other woody material to a height of 30-60cm (1’-2’) either on the ground or in a trench dug into the ground.
- Compact the pile of woody material a little, either by using the end of a spade or jumping on it (depending on the size of the pile and the materials used)
- Cover the woody material with plant materials that compost fairly quickly, such as mulched green prunings, grass clippings, sod or straw.
If you’re using sod (grass with roots attached and soil clinging to the roots), lay it upside down so the grass is at the bottom and the soil/roots are at the top. - Sprinkle a thin layer of compost over the pile to inoculate it with composting microorganisms to get the whole composting process started quicker.
- Cover the whole mound with a thin layer of soil, approximately 2.5cm (1”) is sufficient to cap it off.
- Plant up the hügelkultur bed, and cover with mulch as you would any other garden bed.
Choosing Your Materials
Use the right woody materials when building a hügelkultur bed. Some trees are valued for their timber, which naturally resists decay and rotting, such as Cedar. Obviously, such a timber would be a bad choice. Another type of wood to avoid is one that contains compounds that stop other plants from growing, such as black walnut, which contains the allelopathic (plant growth inhibiting) compound juglone.
You see these warnings in almost every hügelkultur article. Still, seriously, cedar and walnut are fine furniture-making timbers that are highly sought after, so the likelihood of such wood being composted is rather remote. If the branches of these trees are too thin to use for woodworking, leave them under the parent tree as a natural mulch!
Climatic Considerations
One thing to keep in mind about any gardening technique is whether it suits your site/location. A good permaculture designer thinks through their solutions. Building a hügelkultur bed because it is the latest trend or fad in Permaculture is the wrong reason for constructing one. Site analysis is critical in Permaculture design, and its outcome determines which techniques to use. Every design element is chosen for a very good reason.
If we go back to horticultural first principles, a hügelkultur bed is a raised bed, and the soil in any raised bed drains faster than the soil in the ground unless you’re gardening in sand! In the climate where hügelkultur originated, rainfall is generally reliable; water shortages are not a problem. Raising the bed improves drainage, but not enough to cause problems in a climate with amplerainfall.
Now consider how a hügelkultur bed would perform in a region with droughts and water shortages – the mound will be drier than the ground. Mounding is a common technique used in horticulture to create drier conditions for plants and trees that dislike ‘wet feet’ – high soil moisture levels that lead to root rot.
Digging a trench under the hügelkultur bed can help capture more water in the same way that a swale (contour trench) does, but any plant growing on the mound is going to be elevated above the moist soil. The plants growing on the ground beside the mounded bed will access the captured water.
It’s important to consider that techniques from a different climatic region may not work as intended when applied to our own. If we simply copy what others are doing in other parts of the world without understanding how the techniques are supposed to work, we can’t adapt the techniques to our local conditions. Unless you’re in Central Europe or live in part of the world that has similar conditions, you need to think through what you’re doing! Hügelkultur may work for you; it may not; maybe it will work with some necessary changes.
A Matter of Scale
If we revisit Permaculture’s foundational design principles, we see that “In Permaculture, we design and build small-scale systems because they can be managed with fewer resources, which makes them very energy efficient. We also construct these systems as intensive systems to obtain the maximum productivity from these smaller manageable spaces.” – the seventh Permaculture Design principle ‘Small Scale Intensive Systems’
To recycle woody material and return it into the soil, we don’t have to laboriously dig huge trenches, use giant logs or move cubic metres of soil, possibly with earth moving equipment. The modern version of traditional Hügelkultur is great if you have a rural property and the resources to work on such a large scale, but where does that leave everyone else?
A New No-Dig Style Micro-Scale Hugelkultur
The basic principles by which Nature recycles woody materials high in lignins to create highly stable soil humus can be carried out on any scale. Nature uses the same principles to return a giant tree into the soil as it does for a small twig, the only difference being scale and time.
Since most people live in urban areas, and gardening space in many urban areas may be quite limited, I’ve designed a new small-scale backyard hügelkultur system to dispose of heavy prunings, branches, and small logs in a small garden bed.
This new small-scale hügelkultur process I have designed complies well with Permaculture design principles because it is quick and easy to construct, takes very little energy and effort, and makes hügelkultur accessible to a lot more gardeners.
Each 1m x 1m (3’ x 3’) bed should take approximately 5 minutes to construct and is capable of processing up to a 7m (20’) length of 10cm (4”) thick branches or more thinner branches.
The basic process is illustrated in the diagram below and explained in detail in the step-by-step instructions that follow.

Step-by Step Small-Scale Backyard Hügelkultur Construction
Step 1: Select your site
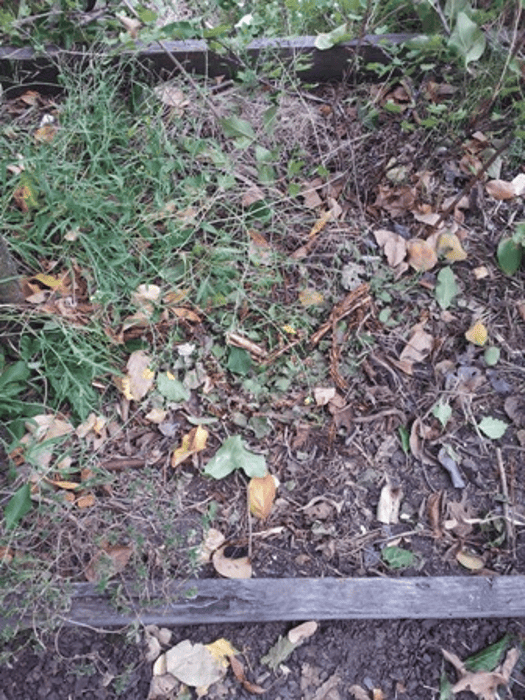
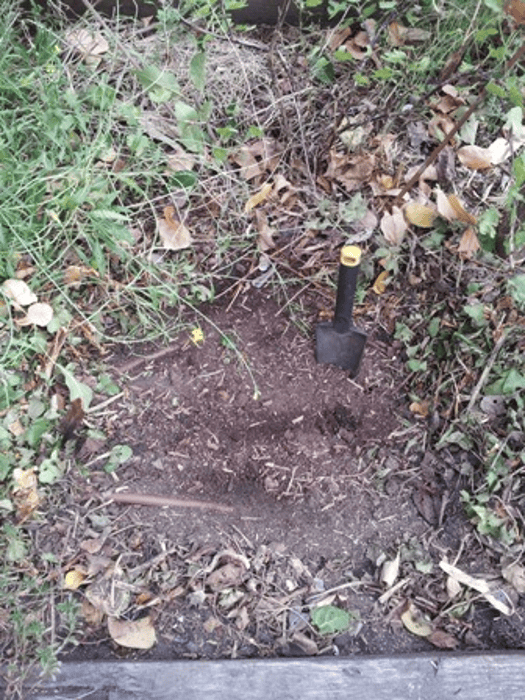
We will build our Micro-scale Hugelkultur system in this no-dig garden bed which has a layer of mulch (dry organic matter) covering the soil.
Step 2: Clear the mulch (in a no-dig or mulched garden bed)
Clear the mulch away from the area where you will construct your Micro-scale Hügelkultur system. You can temporarily place it to the side of the garden bed. This should be a very easy process; here an area of 1m x 1m (3′ x 3′) was cleared with a hand trowel in seconds. (In case you’re wondering, in the bottom half of this photo the brown plastic drip irrigation pipe that sits below the mulch layer is partly exposed near the soil surface.)
Step 3: Gather your materials
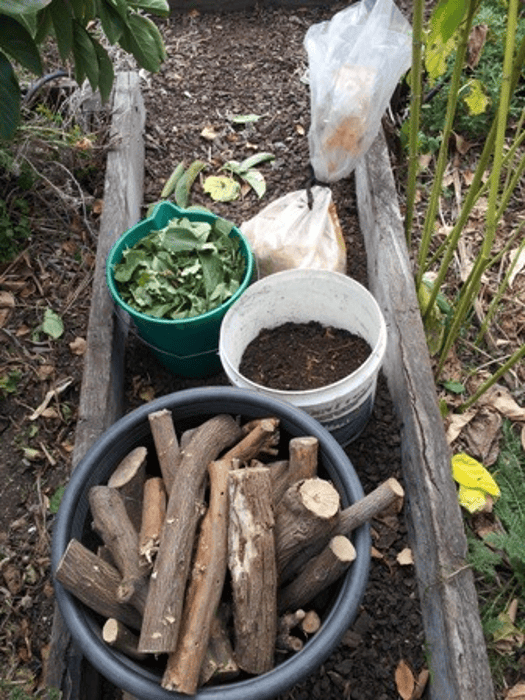
In this example we’re using: heavy branches and small tree trunks that were chopped up with a pruning saw when they were still soft during pruning time; a bucket of homemade compost; a bucket of mulched green garden material; and some blood & bone fertiliser (or any other organic fertiliser such as manure).
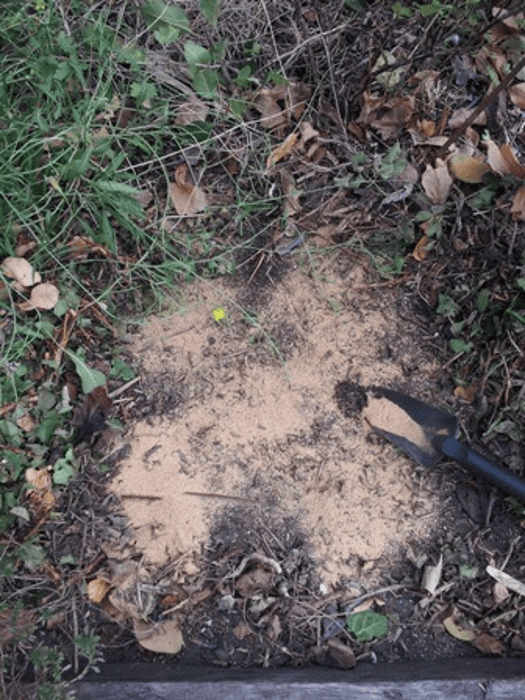
Step 4: Sprinkle a thin layer of organic fertiliser over the exposed soil
In this example, we’re using blood & bone fertiliser; manure will work just as well. Adding fertiliser where the soil meets the woody material helps prevent nitrogen draw-down. This happens when soil bacteria draw nitrogen away from the surface soil (and plants) to break down the wood, which is high in carbon. Remember from our composting theory that for effective composting, we ideally need a carbon:nitrogen (C:N) ratio of 25-30:1, so the fertiliser provides extra nitrogen to support the composting process.
Planting It Up
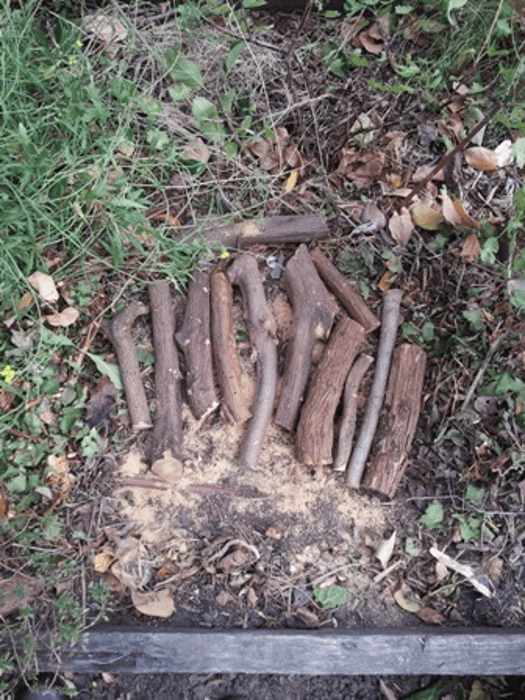
Step 5: Lay down a layer of heavy branches and sticks
Lay down branches and small tree trunks, or any other woody material that is difficult to dispose of another way.
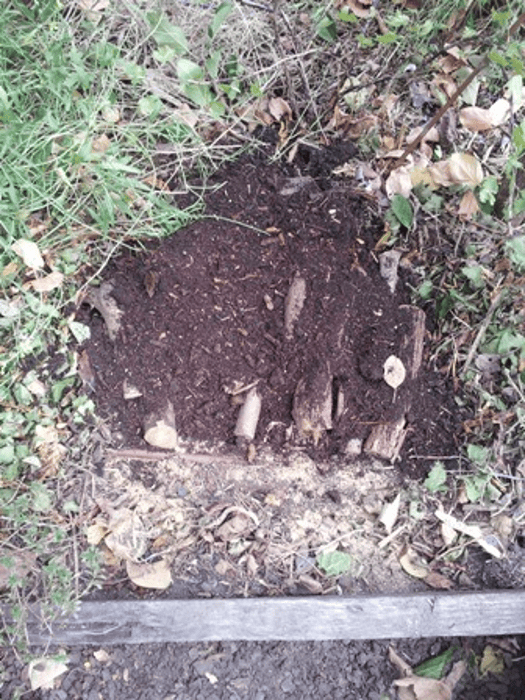
Step 6: Cover the wood with compost
This will ‘inoculate’ the system by providing many soil organisms that will start the composting process. If you made your compost using woody material, all the better, because it will be richer in fungi, which play an important role in breaking down woody material in the soil.
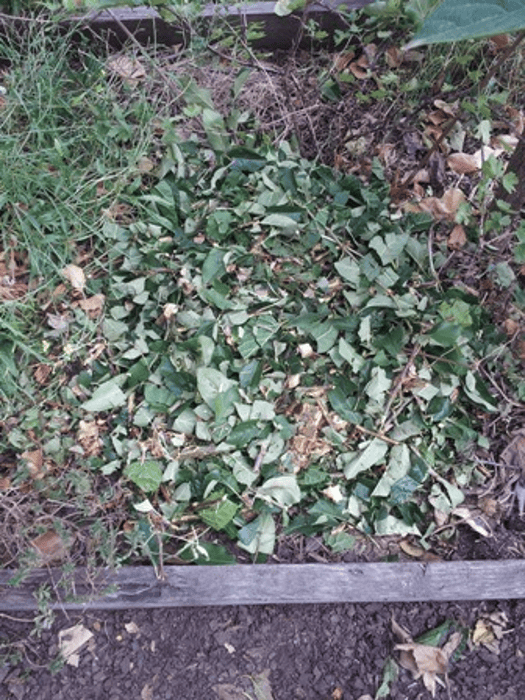
Step 7: Cover the compost layer with mulched green material
This layer will be rich in nitrogen and break down quickly.
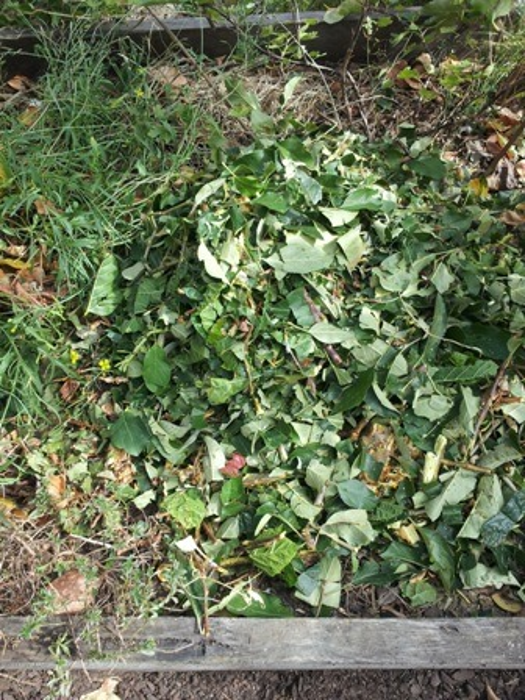
Step 8: Pile on more compostable organic matter
When you think you’ve added enough mulched green garden material or organic matter, add more — pile it high! In this example, the heap was piled to around 45cm (1.5′) high. If it seems too high, it isn’t; the pile of organic matter will drop in size rapidly.
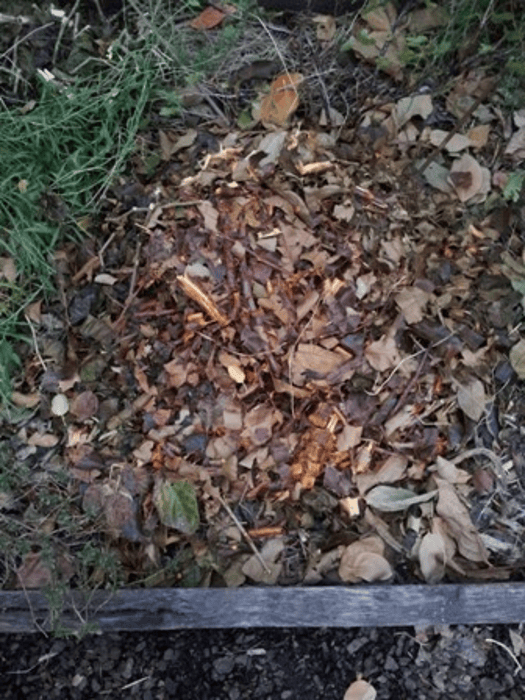
Step 9: Completed, composting begins!
After a few days, the pile has dropped in height and started changing colour. Composting is underway, and all of that wood that you couldn’t get rid of will slowly work its way back into the soil!
So how do we plant up this system?
For starters, you only need to plant it up if you want to; it’s not necessary to do anything else. It will deliver its benefits to the soil as it is.
When we’re ready to plant it up, we use the no-dig gardening planting process, which is comprised of four simple steps:
- Make shallow holes in the mound approximately 10- 15 cm (4- 6 in.) wide and equally deep.
- Fill with compost.
- Plant seeds, seedlings or plants.
- Using a watering can or hose, water in well.

In summary, with either a traditional large-scale hügelkultur system or my new small-scale hügelkultur system, we can recycle tree trunks, branches, and other woody material to create a slow nutrient-release system that improves soil fertility and moisture retention.
Every gardening technique has its place and purpose. If we understand the natural processes that make the hügelkultur system work, we can adjust our design to suit our climate and ensure success.